| DIY-Welder - Build your own Arc, MIG and TIG welder | Page hits: |
| DIY-Welder - Build your own Arc, MIG and TIG welder | Page hits: |
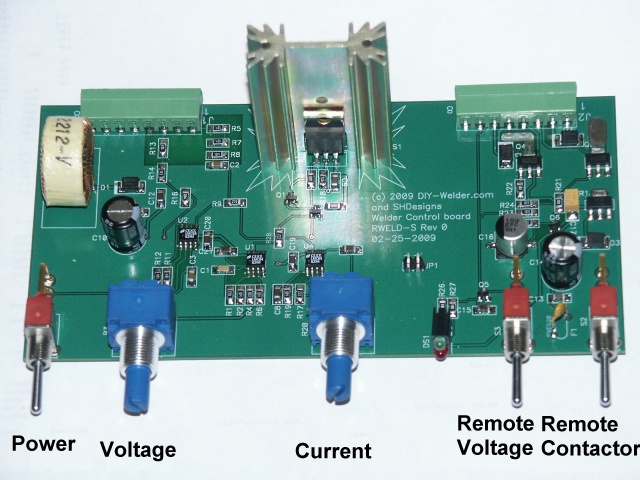
The simplified boards are ready. They work well as it is based on the larger board design.
A manual is in progress. The current version can be found here
![]() .
.
There are 3 switches:
There are two potentiometers (rotary dials):
Voltage - can set the output voltage from 0 to 60 volts.
Current - Sets the current slope an the the current. Set to MAX and the output is constant voltage.
There is a power LED and a remote contactor LED. An output can be used to drive a current meter.
It is relatively simple to use and connect. There are outputs for gas and contactor relays. Main connections for arc welding with an alternator are : Power, Ground, Field +/-, Field Power and the welding voltage and current sense wires.
The schematic can be dowloaded here: ![]() (non commercial use only.)
(non commercial use only.)
I will not answer questions on the schematic. I had it on this page before and got endless questions like "what does a MOSFET do?". IT should allows others to build boards on a perfboard. Note: the part numbers on the schematic are surface mount parts. The through-hole parts would be smlilar and not hard to figure out.
Note: Boards are currently out of stock and I do not plan on building any more boards.
The boards are $70.00 + $5 shipping. To purchase via Paypal, use the "Buy Now" button:
If you would like to use a credit card, but not paypal, send an email to: , Include your address to ship to. I will send a one-time payment link to ProPay.
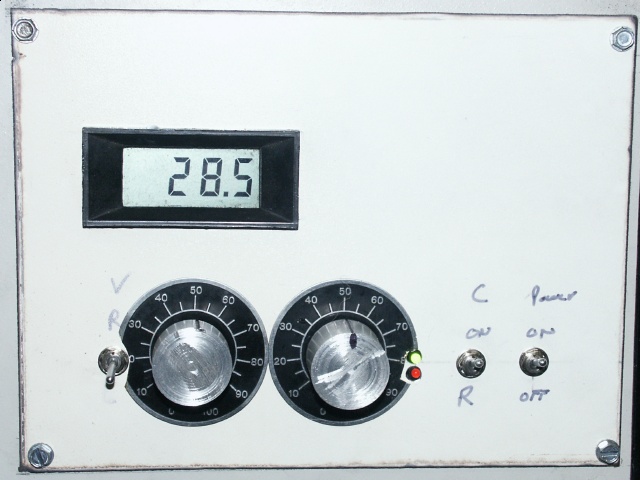
Above is the board installed in my portable welder. I will print out better dials for the controls and labels for the switches and LED's. The LCD measures the output voltage. I may add a current meter also or wire a switch to select between current/voltage.
The above board is working great. I actually prefer it over the digital one as changes can be done quickly.