| DIY-Welder - Build your own Arc, MIG and TIG welder | Page hits: |
| DIY-Welder - Build your own Arc, MIG and TIG welder | Page hits: |
I ran out of boards and before I could remove the link on the web site, I sold another. So, I shipped the one out of the welder.
With no way to use it, it has sat for a long time. I decided I needed it. Still no money to build boards. So, I simply wired a 1 ohm, 10 Amp rheostat between the field and +12V. For arc, it worked as before; surprisingly well. This is the circuit described here. I guessed set at the middle position and it was just about right for 3/32 rods; actually a bit high. Looks like a 10 Ohm would be best.
Still had the issue of the arc cutting out. I removed the two 40,000uf capacitors and replaced them with one 4,700uf/250V cap. Now welds beautifully. The large caps reduced the responsiveness of the alternator to changing loads. Will probably still work for MIG if I put the board back in.
Hopefully work will pick up and I can do another board. I don't plan on building more of the old one. I'd like to do a smart one but not as complicated as the original board.
I found a deal on a broken riding mower. Simple fix (shift linkage). I plan on selling it, but it had this nice 15HP OHV engine. I decided I wanted it for the welder ;). Put the 12HP in the riding mower; plenty for a 38" deck.
|
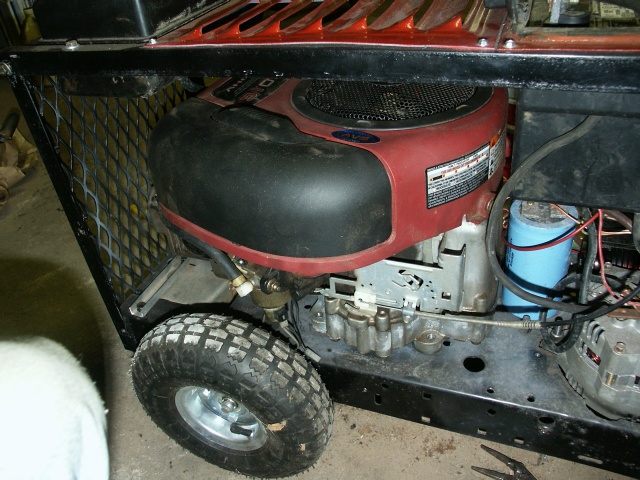
Left Side
|
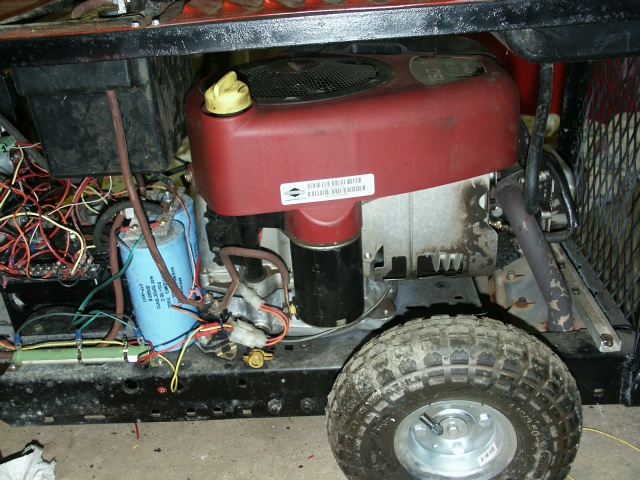
Right Side:
|
The 15HP OHV works well, but has a bit lower RPM than the old 12HP. I need to get a bigger pulley for the motor. It now can only generate 48V at full speed (no load). Used to get 58V.
It is a bit quieter and smoother. You can see dirt on the right side. Someone worked on it and used too long an exhaust bolt so it leaked. Been fixed properly.
Hope to have time to figure out why the output cuts out every once in a while. Still think it is dirty brushes.
With freezing weather and a flooded garage, have not had much time to test the new board. Finally started testing it.
Firsts tests showed a problem with one of the op-amp inputs reversed. That was fixed. Then managed to vaporize some 3/32" rods. Seems the current feedback was not working right. I found I had copied the gain settings from an old schematic from the original board. Put in the right values and it worked.
It works well. Should have the rest built this weekend.
The new boards are in:
Weather has been bad with a flooded garage for over a week. Should be able to finally test them. Then all will be needed is to finish writing the documentation.
Boards ordered, should be here second week of March.
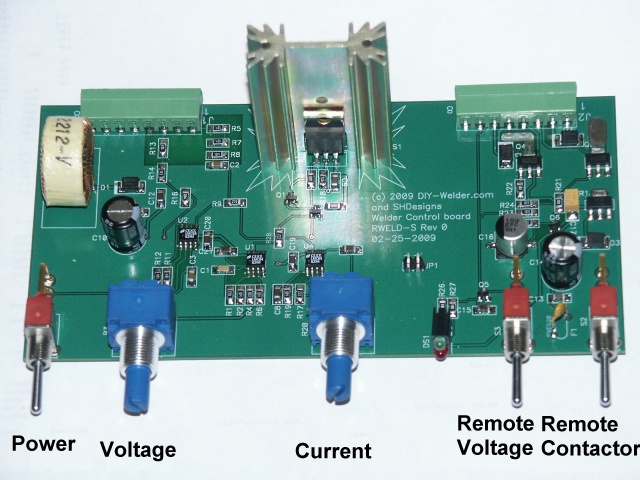
Been busy and have not had time or money to work on this. Now have gotten back to it. I have the "simplified" board laid out and am doing final design rule checks. This will be a simpler version with a voltage and current knobs, contactor, remote voltage and power switches. It is also a right-angle board so it uses a small front panel. It can control an external contactor relay and gas solenoid. Below is the layout:
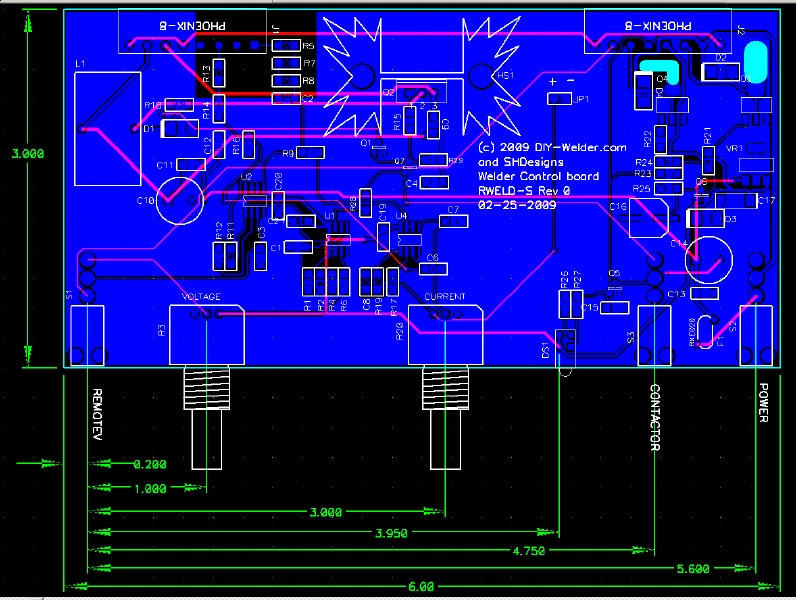
Uses surface mount components as that is easier for me. I will be releasing the schematic soon so others can hand-build them rather than buy boards.
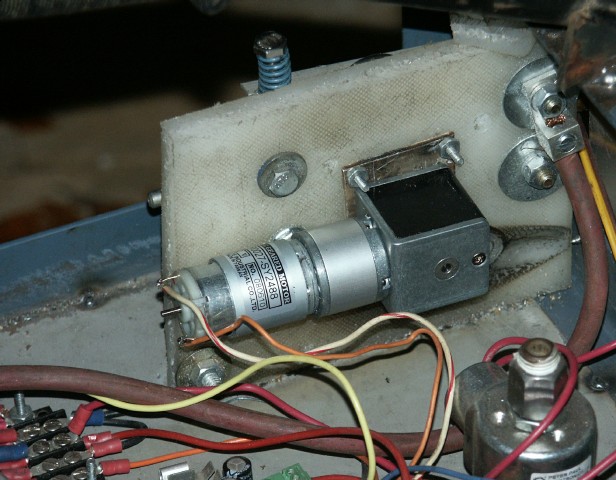
Have the new wire feed motor from Super Droid Robots.
Was not expensive and looks to have lots of torque. Also have new regulator to replace a busted one.
Will get to test MIG welding tomorrow. ;)
Installed a new reactor (purchased from www.surpluscenter.com:
Not much of a difference, but it is a nicer one than my hand-wound one.
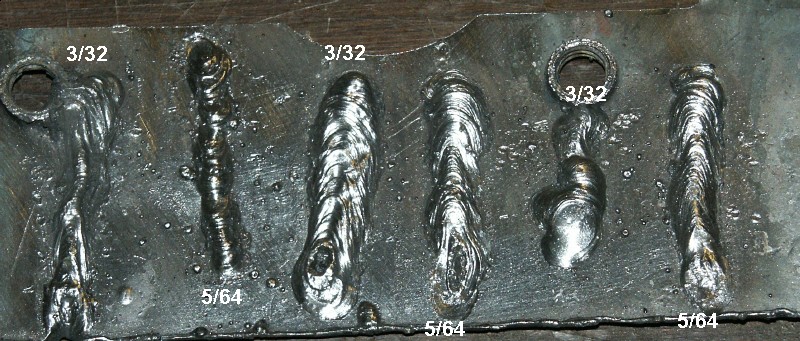
I changed it back to measuring the actual current. Now I can get a higher OCV. It still outputs too much current. The slope is programmable from 0-255. At 70, it is too much for 3/32 rods. I would like it to be more like 140, so will double the gain of the current sense circuit. I used the reactor itself as the current sense; measuring the voltage drop across it. That seems to work well and doe snot require using a resistor (first version used 4' of #6 wire as a resistor.) Did some more test welds; again busy listening and watching the arc and display rather than what I was doing:
Too steep a rod angle, travel too fast and sometimes had long arc length causing spatter. The 3/32 (2.4mm) does cause the 12HP engine to bog a bit. The carb needs some adjustment. With some tweaking, it should run 1/8" (3.2mm) rods with no problem. A newer engine would probably do fine, this is at least 10 years old.
Received a new reactor coil today. Will try it this weekend. The new geared motor was out of stock so I'll have to keep looking.
Have new geared motor for wire feeder coming. Looks like a car window motor. Hope it will be here this weekend.
Also have ordered a reactor coil. Should be smaller and work better.
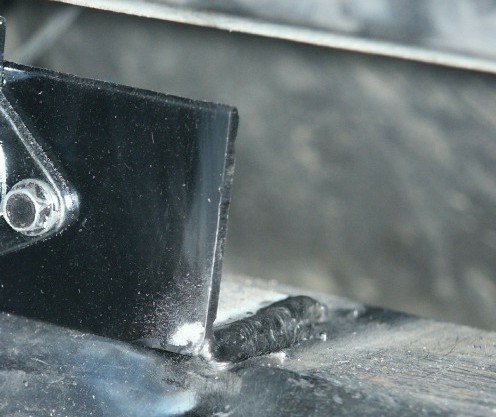
Used the welder today. Welded a bracket on my Jeep trailer hitch for the wiring plug:
Worked great except ran out of gas just as I started welding. The is a picture of the other side in the sample welds page.
Using the field current to gauge the output current has proven a bit unstable. Probably due to the large bank of caps. Also, the OCV is considerably lower than set as it senses some current just to run the field. Works well enough but I'll try using the new reactor to sense the output current when it comes in. It does have a nice smooth arc and easy to control.
Nice to actually do something with it other than test welds.